Showing posts with label Widget. Show all posts

Wednesday, April 27, 2011

Add Cbox comment to Increase Blog Visitor

If you are walking through others Blog site, some of them might have a place like a "Box" to chat on each other. This widget is actually very useful because at the time visitor come into your Blog, they can drop their comment as well as address of Blog. One of the best Shoutbox is called "CBOX" which is helping you to make your Blog looks more interactive. Beside that, by having a CBOX, you will definitely get a lot of friends from around the world and the good thing is you can visit back their Blog or Website too.

Now, you already know the benefit of adding CBOX into your Blog. I would like to teach you how to add CBOX into your Blog as a widget. Some simple steps are explained below:
  • Visit www.cbox.ws for register please click "Sign up" and fill up all information below

  • After that, click "Create my Cbox
  • Put both Login name and Password
  • To get HTML code of widget just find which is located next to Home, click "Publish"
  • Next, you will see HTML code, copy and paste into your Blog. 

  • You need to login to your Blog, then choose "Design">"Page element">Add Gadget>choose HTML> paste the code inside and save it. Try to view Blog, the cbox looks like below
Nice right, let your friends comment what they are thinking for your Blog or just visit as a blogwalking. Good Luck

    Saturday, March 12, 2011

    Get Various Type Of Widget

    Having a Blog is not complete without additional tools like "Widget". it is because some Blog will definitely looks more interactive by putting some widget around there rather than just an article. Beside that, people who are reading your article, they may look for another interesting tools and these widget can be like video, relate article, game many more. Now, i will take you through website which provide various widget tools that you can use it on your Blog called "WIDGETBOX"

    • The first thing to do is you must visit on www.widgetbox.com (Please register by click "Join Now")
    • Under this website you can also make your own Widget, choose whatever you want to create.
    • WidgetBox provide many widget which relate with your Blog title. For example: if you have a Blog about forex, you just need to type on the top "Find Widget" like Forex, then there have so many widget about forex.
    • Now, how to get HTML code and put it into your Blog.
    • Firstly, choose the widget and the screenshoot will look like on the left side (some of widget can be changed both "Width" and "Height" to suit with your Blog)

    • Next, click Blog box on the top to get HTML code, then copy and paste into your Blog.

    • Open your Blogger, choose "Design", "Add Gadget", choose "HTML code" then paste the code there, "Save".
    • Look the result by click view Blog and Viola, you have your new widget. Good Luck

    Thursday, February 17, 2011

    Optimize Blog By Connecting With Twitter

    Another popular Social Network that you must create is "Twitter" which help you to connect with people around the world. Promote your Blog by sign up on Twitter Account. The good thing is when you follow and be followed by people, at that time you update your article directly people also read your update news. Let me show you how to connect Twitter into your Blog. Just follow some steps below:
    •  Create Twitter Account (please refer to here to sign up Twitter). Better you create that reflect your Blog about. If you have already sign in.
    • before create Twitter Button on your Blogger, i would like to share website which have various twitter button, you can get on lead411, www.twitter-button.net, www.twitter-icons.net, www.coolbutton.net. each twitter button need a ID. To find your ID is by choosing profil. Copy the last number is located on the top bar, in some case twitter does not show the number ID, for example http://twitter/#/mysoftwareapp (please change mysoftwareapp with your twitter name)
                                              
    • Paste your twitter ID into box something like below and click "GO", each of under Twitter button has a HTML code and combine with your Twitter ID as well.


    • Next, Open your Blogger and choose design, find "Add Gadget"

    • Get HTML code and copy and paste the code from highlight code above picture. Save it
    • Now, try to view your Blog, if you add successfully, your favorite Twitter button will appear. (Note:

    Tuesday, February 15, 2011

    Optimizing Blog With Connect Into Facebook

    Writing some articles into your Blog is the most important weapon to attract people read it. Beside that, one of the best way to promote our articles is by sharing into Social Networking. At this moment, one of popular Social Network that people already know is using "Facebook" which almost people have it as well as find new friends. By connecting your Blog into Facebook account, this way will definitely not only improve your traffic member but also introduce your Blog as well.

    Today, i would like to help you for creating a Facebook business account, all you have to do is to follow my instruction below:
    • Firstly, you must have a Facebook account first (if you do not have, click here to register). After you have it, choose "Create Page" located below.

    • on the right side, you may choose one what reflect your Blog about instead of fill up your Blog name

    • Next is you must fill up all the information, please choose i already have a facebook account means that you can manage your Blog under your personal name

    • The way Facebook looks like below screenshoot, in here you can explore any tools that Facebook provide to you (add picture, information, even you are able to promote your Blog with an ad)
    • Furthermore, the most important thing is how you connect your Blog with Facebook so that by the time people come into your Blog and click Facebook, they will be brought to your facebook site. 
    • Now, before you connect it, better you may find various Facebook Icon on http://facebookicon.net   
    • after you choose one, then insert your profile ID click the button. (to find your Profile ID is just open your Facebook account and choose profile, on the top of bar, there have an ID number, copy it). 


    • Open your Blogger, choose design and add gudget to get HTML code, Paste into these HTML and save it. Try to view page, if success the Facebook icon will appear on your Blog (choose location that visible so that reader can find easily). Good Luck

    Tuesday, February 8, 2011

    Improve Blog With Addthis Sharing Bookmark


    Having a good article is a must, but it does not looks complete without one of this tool which is called "Addthis". This tool helps you to share your article into your friends, business or other reader outside there. Moreover, with adding "Addthis tool" into your Blogger, it will absolutely improve your Blog especially for sharing articles. Now, i am guiding you to create "Addthis Bookmark" with just following simple steps below:
    • open your browser and type "Addthis" into Google and click the site.
    • once you come into Addthis site, choose get add this located above.
    • The first step is to choose blogger because you use blogger and then scroll down, you are able to choose style of Gadget sharing with just tick one of them, the screenshoot will look like below

    • There have two choice either you want to add analytics (must register first) or just get the code.

    • Next window will show you to Grab the code means that if you are willing to put this code by HTML code, choose design and add Gadget, then find HTML by Cut and Paste something like below
    • Second way is by select design and choose edit HTML, to put code inside HTML code you must check the expand widget templates checkbox. This checkbox is located in the top right corner of the page, above the code. By clicking the checkbox, the code in the field below will refresh.   
    • Copy and paste the AddThis code snippet into the template, right after the <div class='post-footer'> tag. Note: If you have trouble finding this DIV, try copying and pasting the blogger code into a text file editing program and do a search for 'post-footer'. Once you located it, copy and paste the AddThis button code below the DIV. Then copy the entire text file and replace the code on blogger. 
                                   undefined
    • Click Save Template, and you're done! A new page will load along with a confirmation at the top of the page should appear that reads, "Your changes have been saved. View blog." Click View Blog to preview your blog with the new AddThis button. The button should appear beneath each blog post 


                                undefined
        
    That guides above are easy right, so if you have interesting articles, LET SHARE IT. the advantage is the reader can recommend your article with share it by using various Bookmark from Addthis. the more your share article, the more reader will come into your Blog. See you again.

    Tuesday, February 1, 2011

    How To Create RSS feed and Email Subscription

    Basically, when you have some articles and people like reading your article because of interesting content. It is the best time to ask reader in order to subscribe. Today, i am going to teach you on how to create a RSS feed gadget so that at the time people read the article and like it, they can easily find RSS feed which help them follow and subscribe your Blog. the best widget is called FeedBurner is the tool that we will discuss and apply to your Blog. RSS means that Really Simple Syndication 

    You just need to follow simple steps below:
    • Type on Google browser "FeedBurner" and come into the site www.feedburner.com. In this case you need to have a Google Account (if you do not have create Google Account)  

    • After that, go back into the main site on feedburner, then type both Username and Password

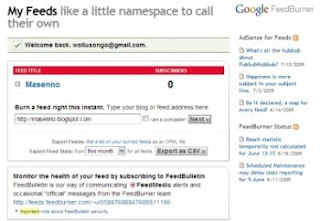
    • on the first step, please type inside your Blog address (don't forget to type http://) click "Next" to burn your Blog.


    • when the Burner is completed, you will definitely be able to create variety of tool from FeedBurner, these three common tools which is usually used by webmaster such as RSS (choose Chicklet Chooser) and tick whatever you like, then select Blogger it will automatically appear on your Blog.

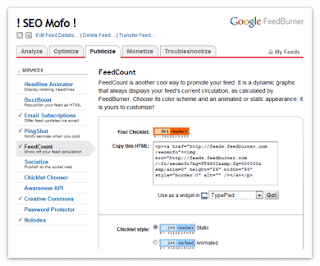
    • Second tool is FeedCount which means your Blog will show you how many visitor come into your Blog. You also be able to choose the color, like usual select Blogger to connect with your Blog automatically.
    • Lastly is Email subscribe which means you provide the box to ask people for typing their email address to get your update article. Select Email subscriptions and choose Blogger for connecting automatically.

     That is it, these three common tools which Email, RSS, FeedCount will increase your blog significantly instead of analyzing your Blog with graph as well as statistic data. Good Luck

      Friday, January 28, 2011

      Increase Number of Reader With Google Translate

      Today, i would like to share on how to translate your main language into other various languages. Basically, when you are writting an artichel by using your own language sometimes people can just read your article if they understand. For example, you write the article with Indonesia language so that people who understand Indonesia language only are able to read it but the rest do not understand completely. In fact, this situation your Blog is difficult to be read by other nations outsite Indonesia, it is definitely limit your visitor.
      There has a good tool to help your Blog is read all reader which is using "Google Translate" means that this tool is very powerful to help reader. I will teach you in putting Google Translate tool inside your Blog, simple step are explain below:
      • First, open your browser and find the tool in Google by typing "Google Translate Tool" or just Visit www.translate.google.com/translate_tools
      • Second step, copy and paste this snippet of code into your Blogger, the code looks like something below

       <div id="google_translate_element"></div><script>
      function googleTranslateElementInit() {
        new google.translate.TranslateElement({
          pageLanguage: 'en'
        }, 'google_translate_element');
      }
      </script><script src="//translate.google.com/translate_a/element.js?cb=googleTranslateElementInit"></script>

      • Now, open your Blog and select design, then choose "Gadget"
      • After that, find the HTML and "Click it"
      • Paste all code above and click save it. the layout depends on where you want to put it

      • Viola, the Google Translate will automatically appear on your Blog
         
        The way is easy right, by having Google Translate inside your Blog, it will improve significantly reader from a round the world because they will choose whatever languages they want. Good Luck

      Related Posts Plugin for WordPress, Blogger...

      Subscribe via email

      SIGN UP now if you feel useful information as well as receive other site updates!